Anyhow, I am now trying to catch up on this blog with some projects that I made in November for Creative Scrap Designs. It the last month being on this DT but I did have fun while on it.
This 1st project I made was made using the November kit which included the beautiful collection from Bo Bunny "Christmas Carousel" . Its super cute! It also included some matching 12x12 cardstock. Along with super cute Xmas themed chipboard!!
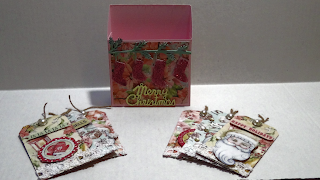
So I came up with this Xmas Gift Box with Tag Set. I followed a tutorial on YouTube on how to make the box. I had wanted to have a lid for it but had made the tags already and the tags were a slight too big for it to have a lid so I just left it out . Anyhow I made the base using the pretty pink cardstock from the kit. Then cut out some of the BoBunny paper from the kit as well.

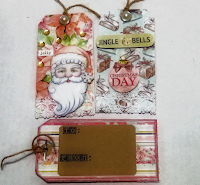
The tags were fun to make as well. For the base of the tag I used some of the left over cardstock that the pieces of chipboard come on from Creative Scrap Designs. Its pretty thick alone and once you add your pattern paper it makes it more sturdy. So I papered it on both sides, I didn't embellish it too much on front. I did prop some of the fussy cut images with the best glue for that from Helmar. On the back part of the tag I cut out some small cardstock and stamped "To:" and "From:". I thought they turned out pretty cute. I made (4) TAGS total for this.

The 2nd project I made was this Star shaped Mini Album. I thought I was super cute and definetely something I wanted to use a more traditional paper that I had in my stash, I actually used 2 different ones but they still each have those traditional colors. I painted just the edges of the star shaped chipboard with Folk Art Red acrylic paint. I then traced the shape onto the pattern paper I wanted to use from DCWV. I cut it and adhered it to the chipboard. Added a variety of embellishments, chipboard from the kit.
I will post a video of the entire album down below so you can see each page. I tried using chipboard in pages, tried to make it somewhat function-able. I hope that u like what I did with his mini. Sometimes these shaped ones take a little more work but they do turn out stunning!! I love it!! Hope u do too!
I hope that you enjoyed my blog post although I'm kinda late but I myself love looking at Christmas projects all year long and getting some sort of inspiration for the following year!! I have one more to share that is Christmas theme. That will be my next posting!! Thanks for visiting! xoxo, Jeanne


