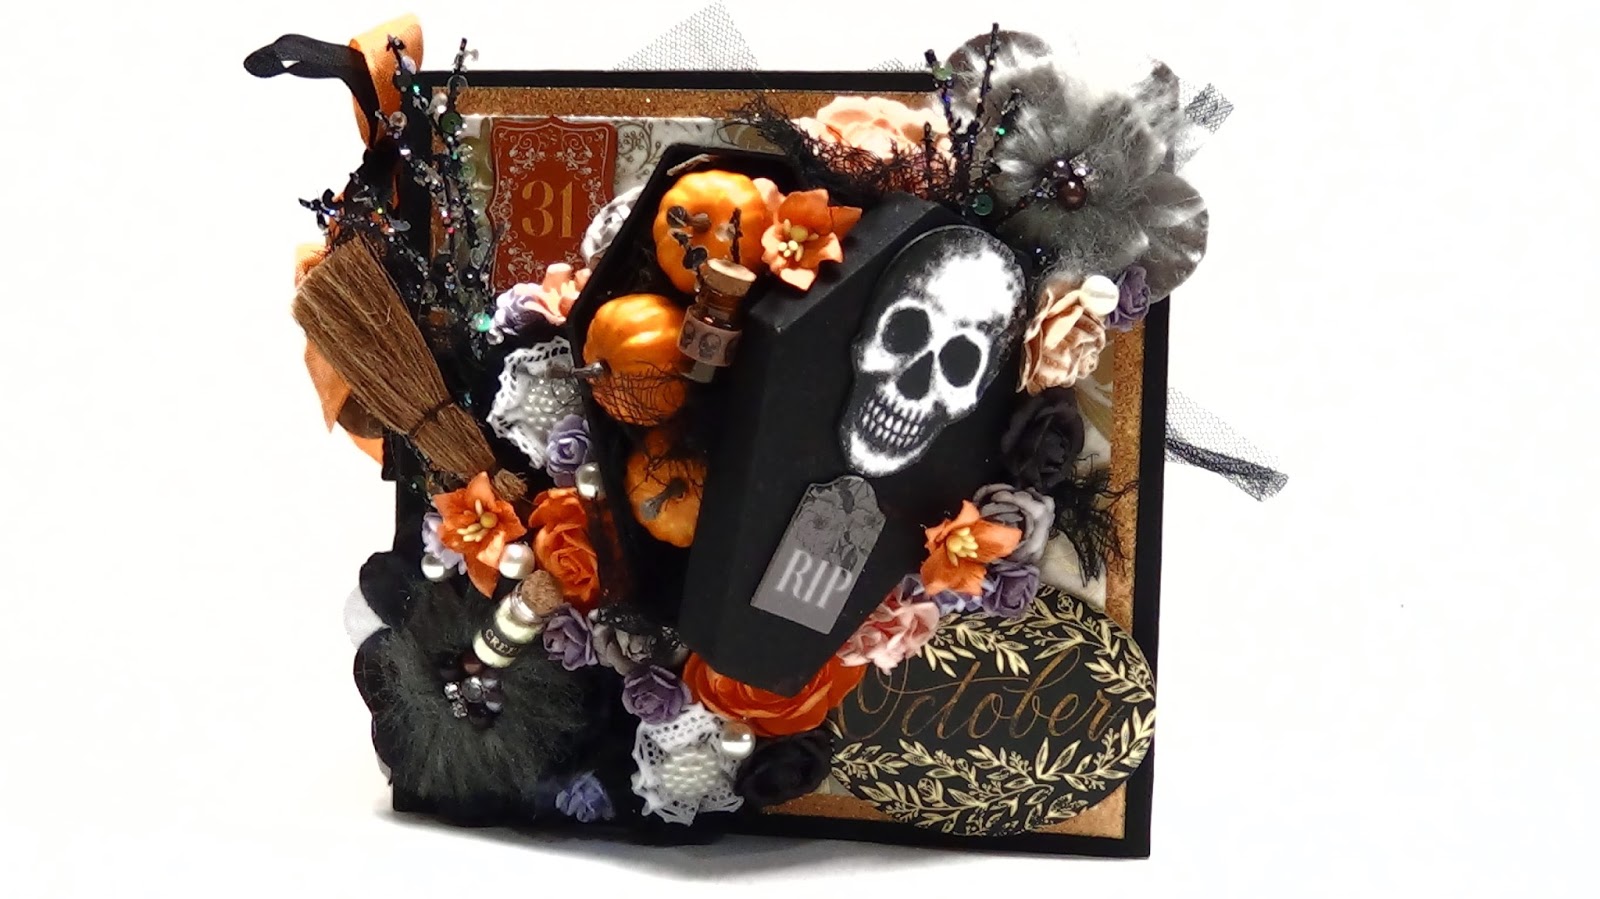
I'm back with my last projects for the months of November and December of 2017 for Helmar Adhesives . The November project I still wanted to still keep a "fall themed" project going . I decided on making a fall mixed media card. I also wanted to use some of the left over paper that I used for a mini album that I made using the Prima Amber Moon paper collection.
This card measures 5 1/2 X 5 1/2 base. I began by cutting my base from kraft card stock . I then cut my pattern paper I believe it was 4 3/4 but then I used my Tim Holtz distress tool all the way around and then applied a corner stencil with DecoArt Modeling Paste. I then used Tim Holtz Gathered Twigs Distress Ink around the pattern paper that I had distressed earlier.
I also then sprayed Prima Bloom spray Worn Leather on the area that I stenciled . Then sprayed it with my water bottle to tone down the color. I didn't want it too dark just a little distressed. I then adhered this base to the bottom using Helmar Super Tac EVA Glue I don't adhere anything to the base until I am finished with the top base because I don't want to stain or ruin in any way the bottom base.
I then adhered some white cotton lace to the bottom of the card using Helmar 450 Quick Dry Adhesive. I used to as well on the Prima flowers
The last thing I added to my card was a sentiment on my card. I applied it with some of the Helmar Liquid Scrap Dots. Definitely enjoyed making this card ! 💖💖💖💖💖💖💖💖💖💖💖💖💖💖💖💖💖💖💖💖💖💖💖💖💖💖💖 As for my December project, I had been wanting to make one of these 3-D stars I had seen on Pinterest a long while back so I finally decided to make it this Christmas!
I hope that you like these Christmas themed projects and you will give them a try! Thank you for checking out my post! Hope u have a Merry Christmas!!! Xoxo
Hi everyone! I've been MIA for a bit, aside from my mother passing away in November, I've been dealing with lot of health issues, they are much bigger than what I was already dealing with. I'm gradually getting better. So I'm hoping this year I'll have the energy to do alot more than I had been and things that I've been putting off. Anyhow, I am now trying to catch up on this blog with some projects that I made in November for Creative Scrap Designs. It the last month being on this DT but I did have fun while on it. This 1st project I made was made using the November kit which included the beautiful collection from Bo Bunny "Christmas Carousel" . Its super cute! It also included some matching 12x12 cardstock. Along with super cute Xmas themed chipboard!!
So I came up with this Xmas Gift Box with Tag Set. I followed a tutorial on YouTube on how to make the box. I had wanted to have a lid for it but had made the tags already and the tags were a slight too big for it to have a lid so I just left it out . Anyhow I made the base using the pretty pink cardstock from the kit. Then cut out some of the BoBunny paper from the kit as well.
I then got the adorable chipboard that has the stockings on a branch and used my Lindy's spray , I brushed it on along the branch. Then painted my stocking with the Prima paint that came with the kit. after it dried I covered up the branch area, I used some spray adhesive from Helmar to spray the stockings and then added some glitter from Prima as well. I love how that turned out. I had a gold plastic xmas embellishment that I had purchased a couple of years ago from Michaels. So I adhered it on the bottom. I didn't wanna over embellish and take away from the beautiful paper.
The tags were fun to make as well. For the base of the tag I used some of the left over cardstock that the pieces of chipboard come on from Creative Scrap Designs. Its pretty thick alone and once you add your pattern paper it makes it more sturdy. So I papered it on both sides, I didn't embellish it too much on front. I did prop some of the fussy cut images with the best glue for that from Helmar. On the back part of the tag I cut out some small cardstock and stamped "To:" and "From:". I thought they turned out pretty cute. I made (4) TAGS total for this.
The 2nd project I made was this Star shaped Mini Album. I thought I was super cute and definetely something I wanted to use a more traditional paper that I had in my stash, I actually used 2 different ones but they still each have those traditional colors. I painted just the edges of the star shaped chipboard with Folk Art Red acrylic paint. I then traced the shape onto the pattern paper I wanted to use from DCWV. I cut it and adhered it to the chipboard. Added a variety of embellishments, chipboard from the kit.
I will post a video of the entire album down below so you can see each page. I tried using chipboard in pages, tried to make it somewhat function-able. I hope that u like what I did with his mini. Sometimes these shaped ones take a little more work but they do turn out stunning!! I love it!! Hope u do too!
I hope that you enjoyed my blog post although I'm kinda late but I myself love looking at Christmas projects all year long and getting some sort of inspiration for the following year!! I have one more to share that is Christmas theme. That will be my next posting!! Thanks for visiting! xoxo, Jeanne
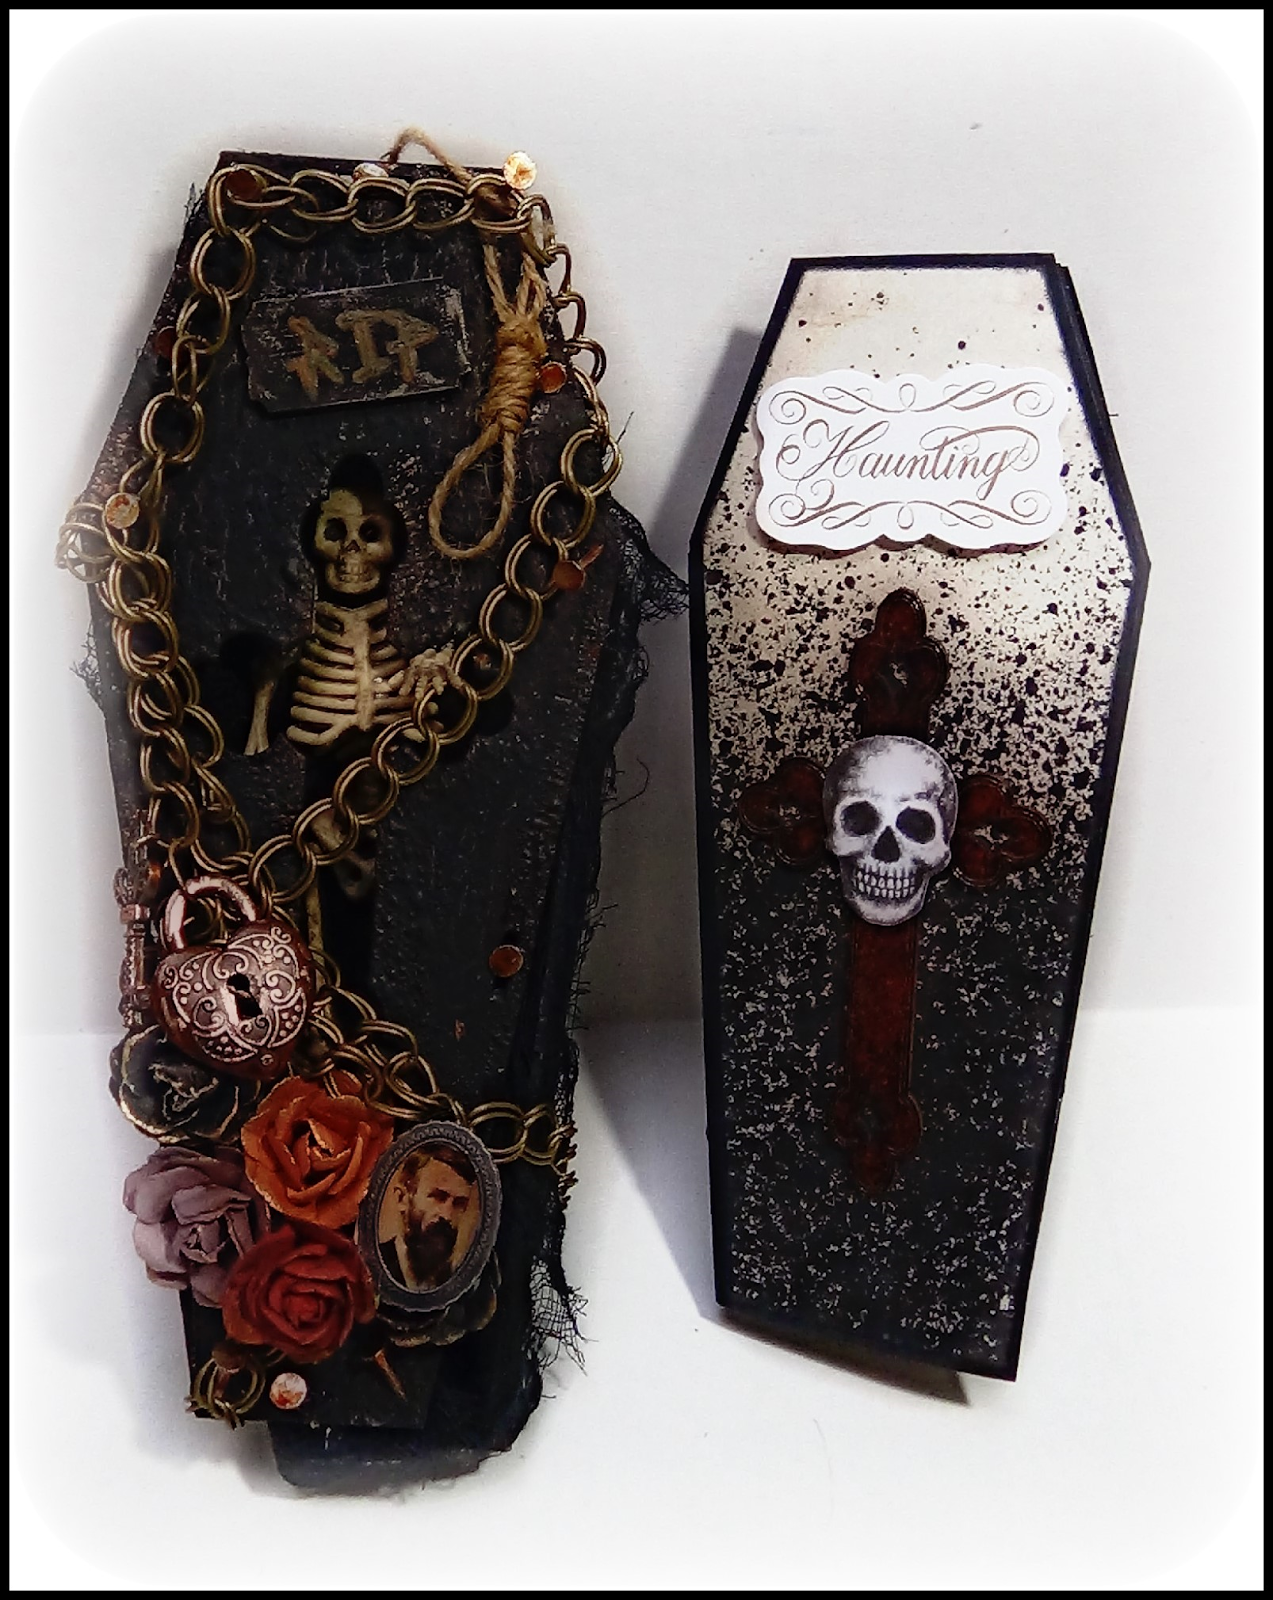
Hi friends, I'm running a little behind on my last couple posts on here. These projects were made for both Helmar Adhesives as well as for the online store Creative Scrap Designs. This was actually my 1st one for Helmar and it had to be Halloween themed. So when I received the Oct. monthly kit from Creative Scrap Designs along with the Add-on Kit, I knew that this would def. be a combination project!
In the monthly kit for October from Creative Scrap Designs, came with a variety of chipboard pieces that were designed by the store owner Mai Larsen, Embellishments, Paper. Below I will post the video of the unboxing I did for this kit!
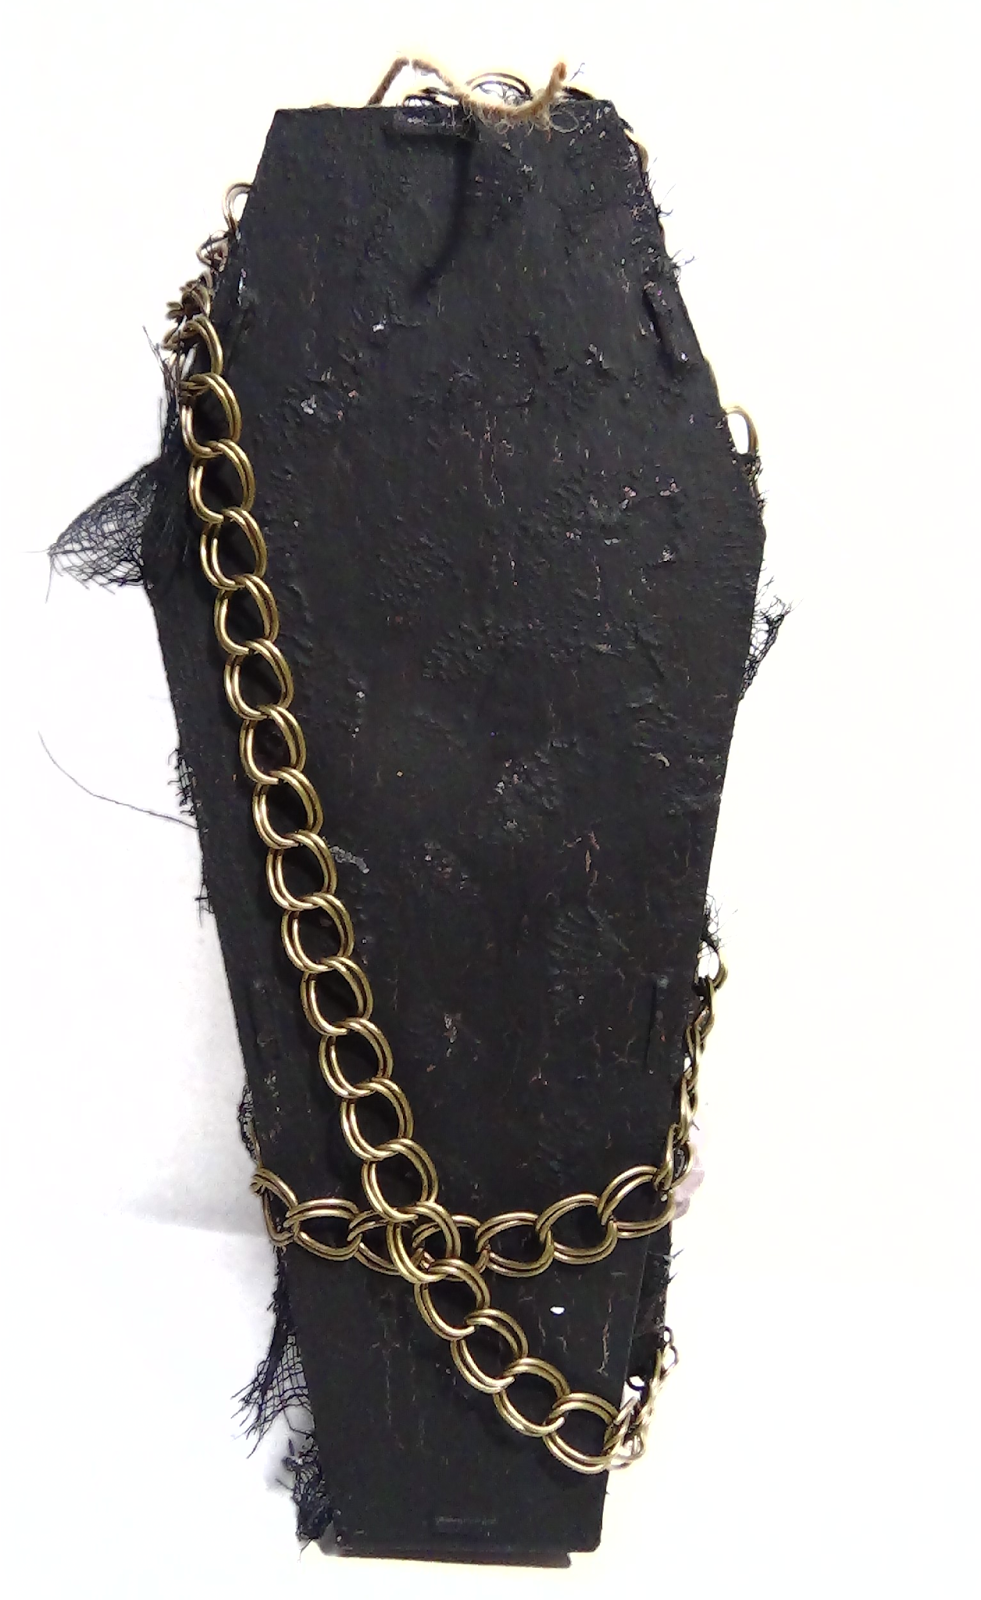
I also did a Picture tutorial on Snapguide showing the steps that I did making these projects! The accordion album has a couple spots for some small photos, the coffin I tried to make it look sort of burned, worn out. Used a variety of paints, mediums to complete this look.
Here is the link to my Snapguide tutorial as well as the YouTube video on the unboxing of the kit and the Add-on I used for these projects!
I really liked working with the variety of adhesives that I used on these projects! Down below I will list the links to both Helmar Adhesives and Creative Scrap Designs!
I hope that you enjoyed this blog post and I hope you will join the facebook group for Creative Scrap Designs to be able to purchase the monthly kits and check out the website for all of your chipboard purchases, Mai is coming up with new designs almost weekly. Also check out the Helmar online store or you can purchase most of their products @ Hobby Lobby & Joann's as well as other craft stores.
I hope u will keep an eye out for more great projects!
Hello again my crafty friends!! Today I'm excited to share a couple of projects that I created for Creative Scrap Designs. I really am enjoying using the contents of the October kit that owner and designer Mai Larsen had put together in this kit. Below I will post the YouTube video sharing the wonderful DT package I was sent! This first project is a Waterfall Mini Album, it wasn't part of the kit but was part of my DT package. From the kit I used the 8x8 paper pad from Tim Holtz, some of the Halloween chipboard designs that Mai created. As well as other small embellishments.
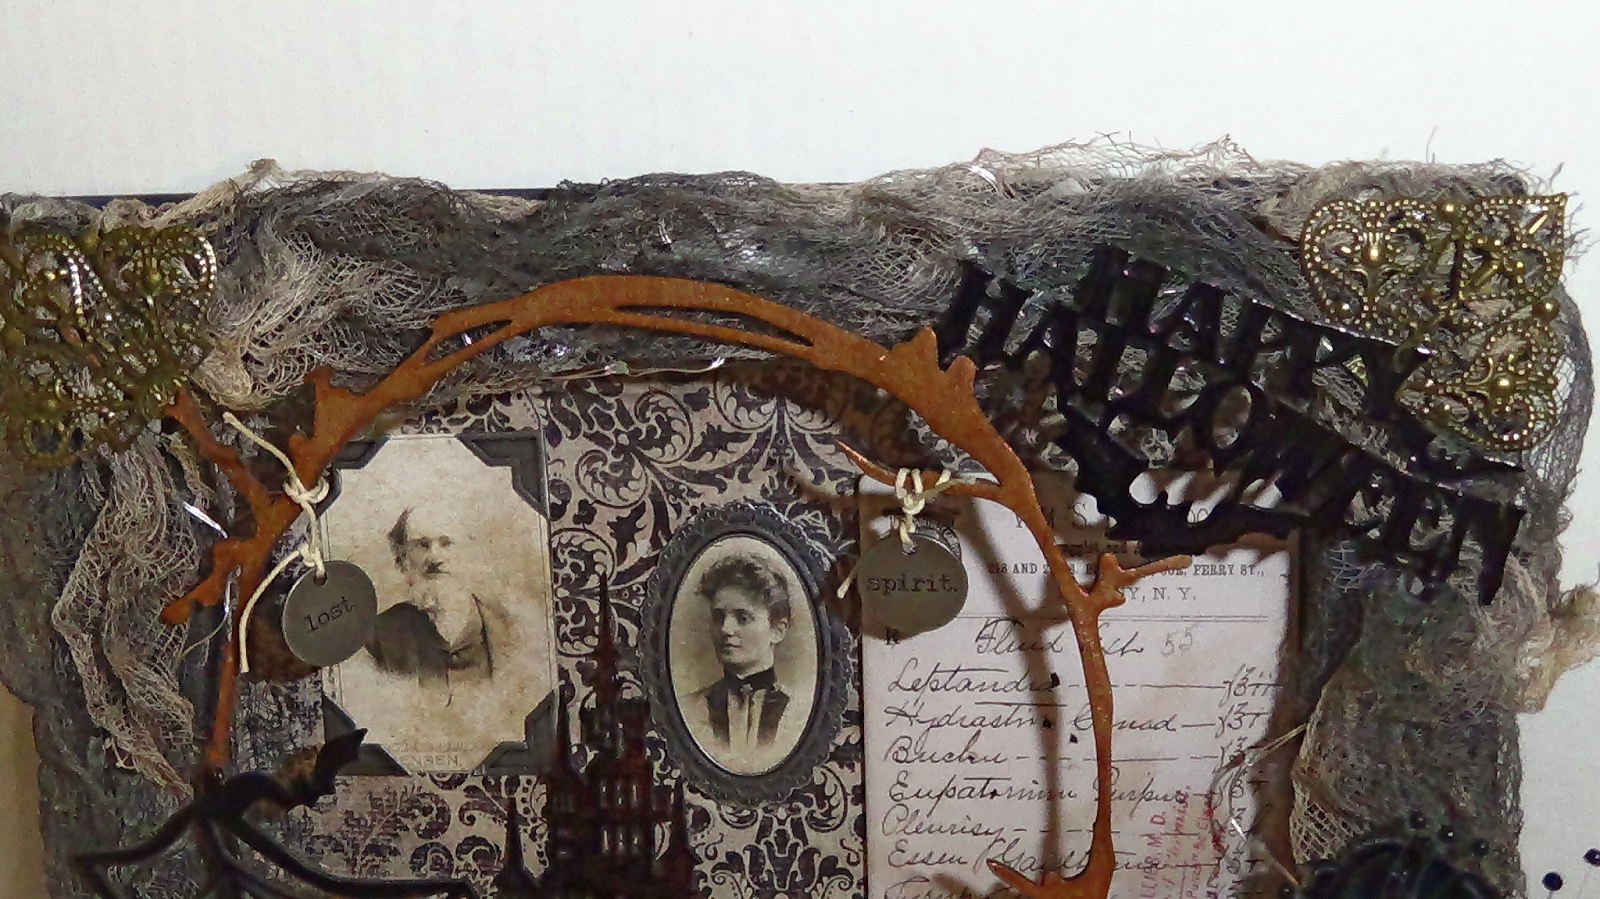
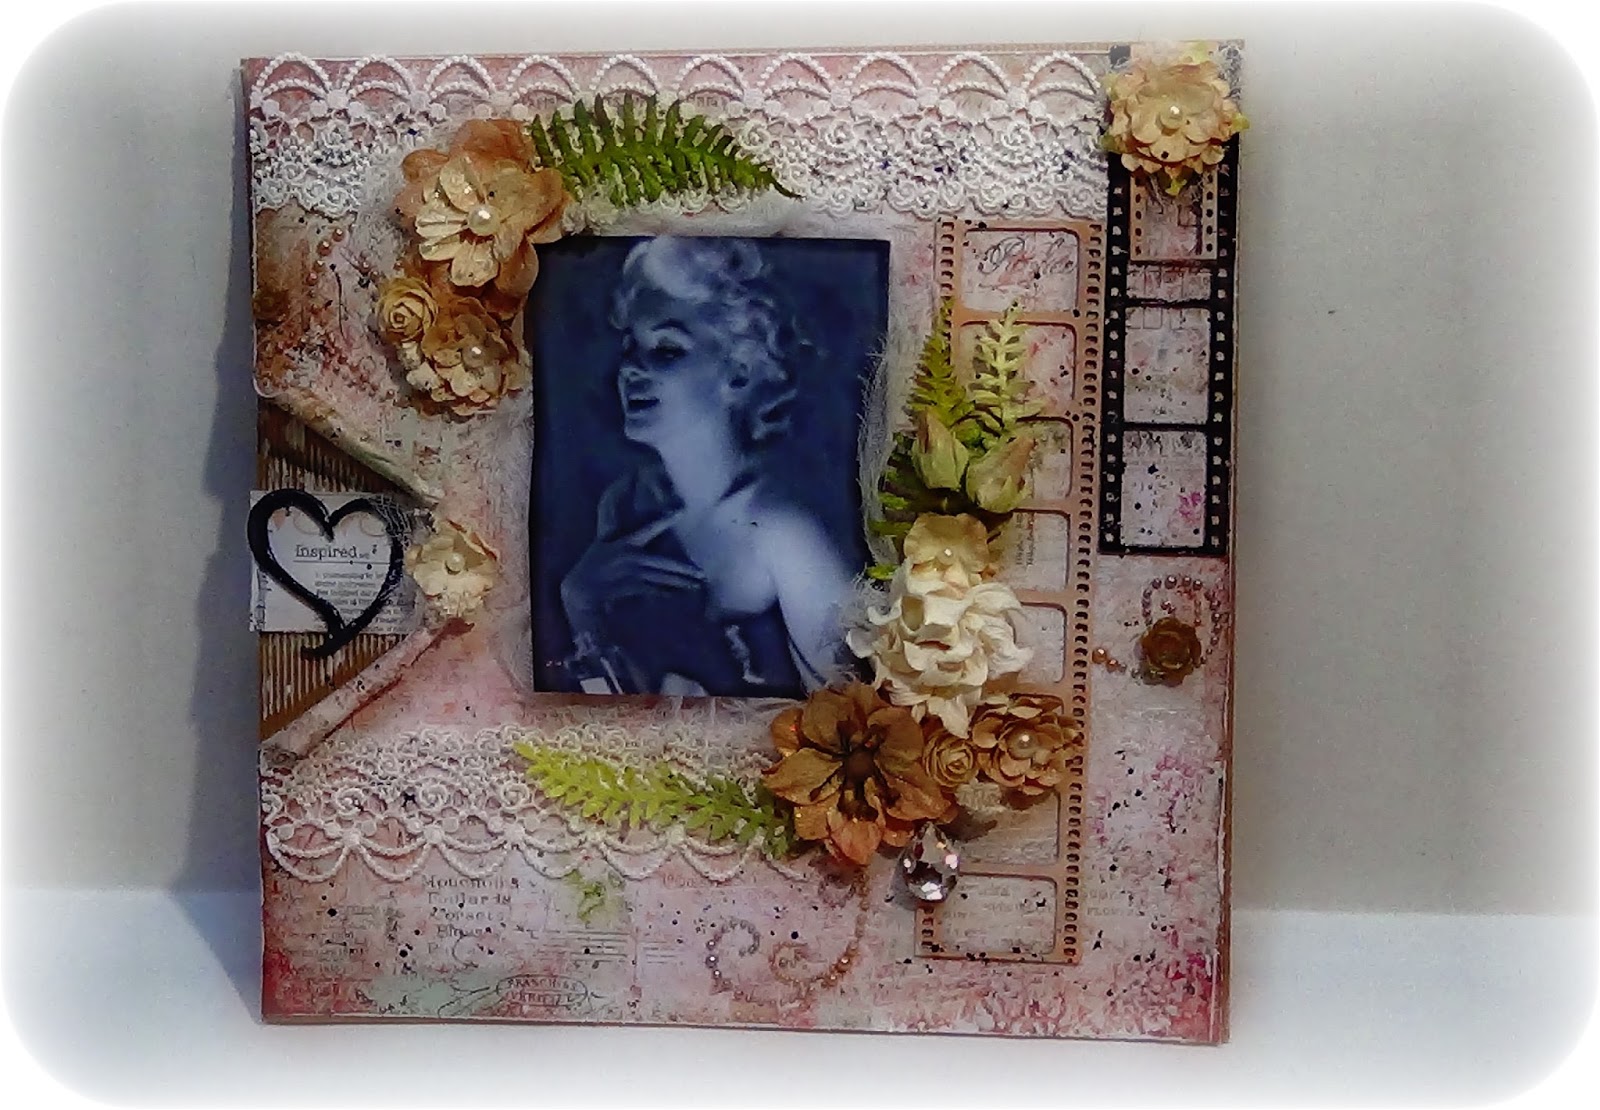
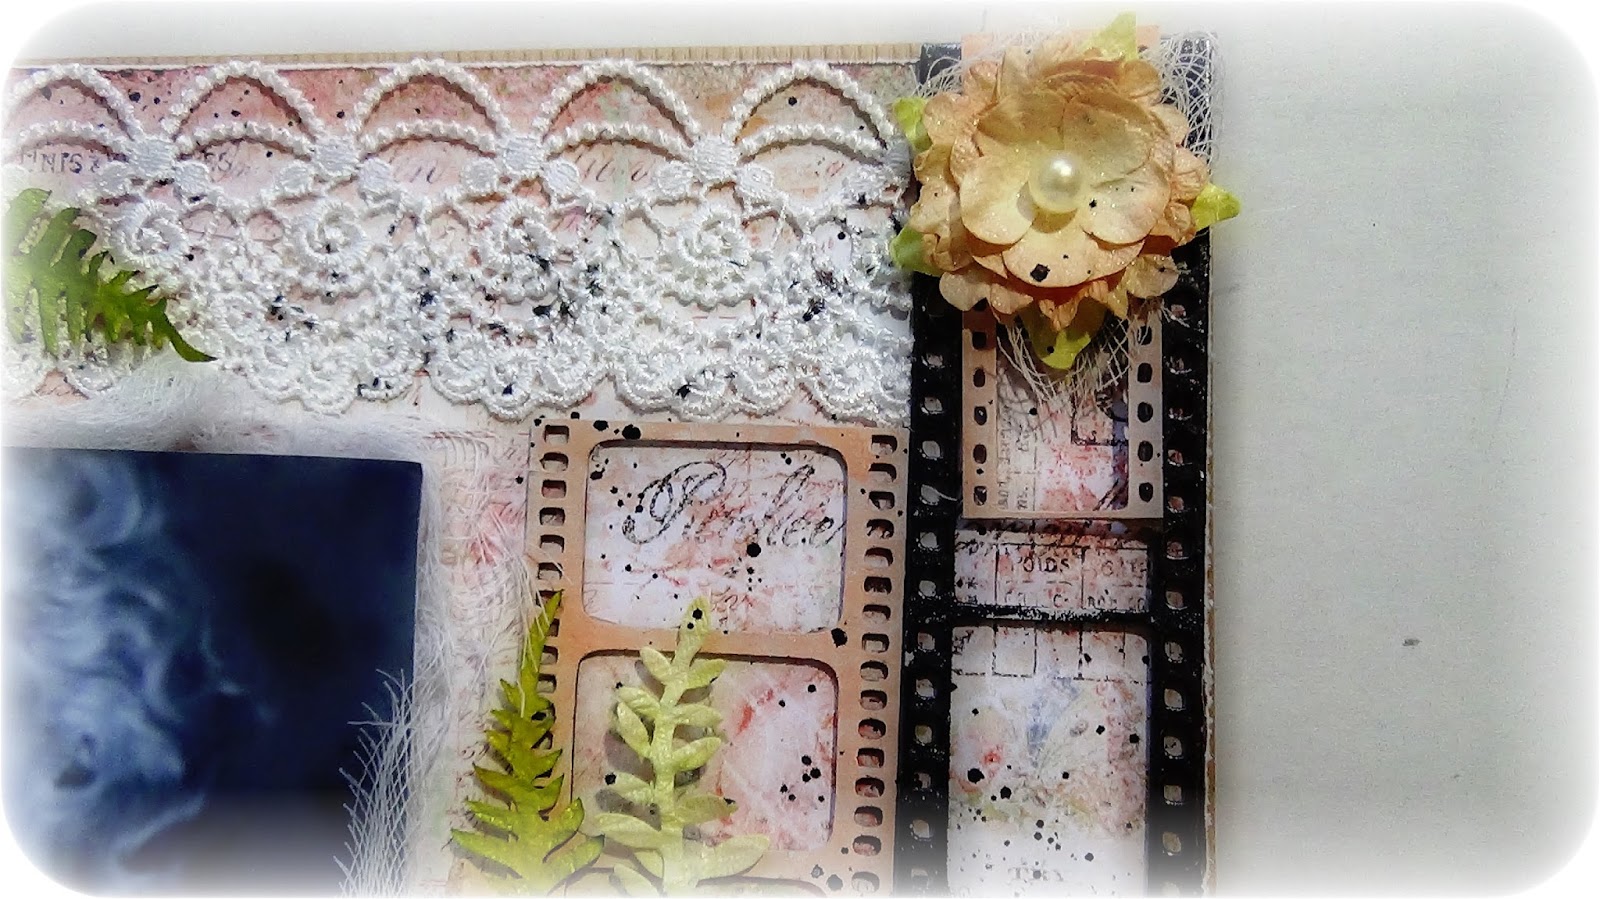
My next project is a canvas/shadow box that I made using the white canvas that was included in the October kit. I decided on making it more vintage themed with a little bit of Halloween in it! I pained it with black gesso, I then sprayed pieces of cheese cloth using some Lindy's sprays and Prima bloom sprays, I also used some tiny LED Lanties from Prima, some chipboard from the kit, I embossed them using the powders that came in the kit. I used the Tim Holtz Baseboard embellishments , they came in the kit too.
I used some metals I had received in my Sept. DT package for the upper corners. I used some fabric flowers from my stash , I picked these cuz I wanted it to look a little vintage. I used some alcohol inks on some small vials then cut out some tiny pictures from one of the 8x8 papers. I used also some photos that I cut out from there as well. I framed them using some Tim Holtz stickers from my stash. I also tied up a couple of the Tim Holtz Halloween Typed Tokens that came in the kit.
I hope u liked Part I of my projects! I thought I would share these two first then this month I'm doing an extra one so the next two will be up by the end of the month! Below is the YT video so u can see the rest of the Waterfall mini! Thanks for checking out my post today! XOXO,
Good morning crafty friends! I just wanted to pop in real quick to share some wonderful news! A couple of months ago I was asked to be a contributor to the blog for The Paper Mill Store. It is a part of their Halloween Round Up this month! I had made my Halloween Mini album for this project and I love how it turned out!
I would greatly appreciate it if you took a look @ my feature along with other crafters! If you click on this LINK it will take you to this post!
Thank you again Steph, the editor of this blog for the amazing opportunity! I hope that I will be asked sometime in the future to contribute to their blog!
Good morning crafty friends! I've been super excited, over the moon to share with u my very 1st Projects that I made using the September Kit from Creative Scrap Designs ! I have taken photos of the first two projects and the last one I combined it in a short video where you can see my attempt at a mini junk journal using supplies from my DT kit . The 1st two layouts are made with the products from the Sept. kit ! Hope u are inspired by my projects!
If you haven't heard its not only the newest craft supply online store but better than that, its the newest place you can find beautiful, intricate designs and cuts of chipboard. Not only can you find these online but if you join up the group page on Facebook, you can view more, you are able to sign up in the group for the monthly kits and see products on facebook live the moment Mai takes them off of the machine! HOT OFF THE PRESS! This and many more other updates so I'll post the links down at the end to all of the social media sites.
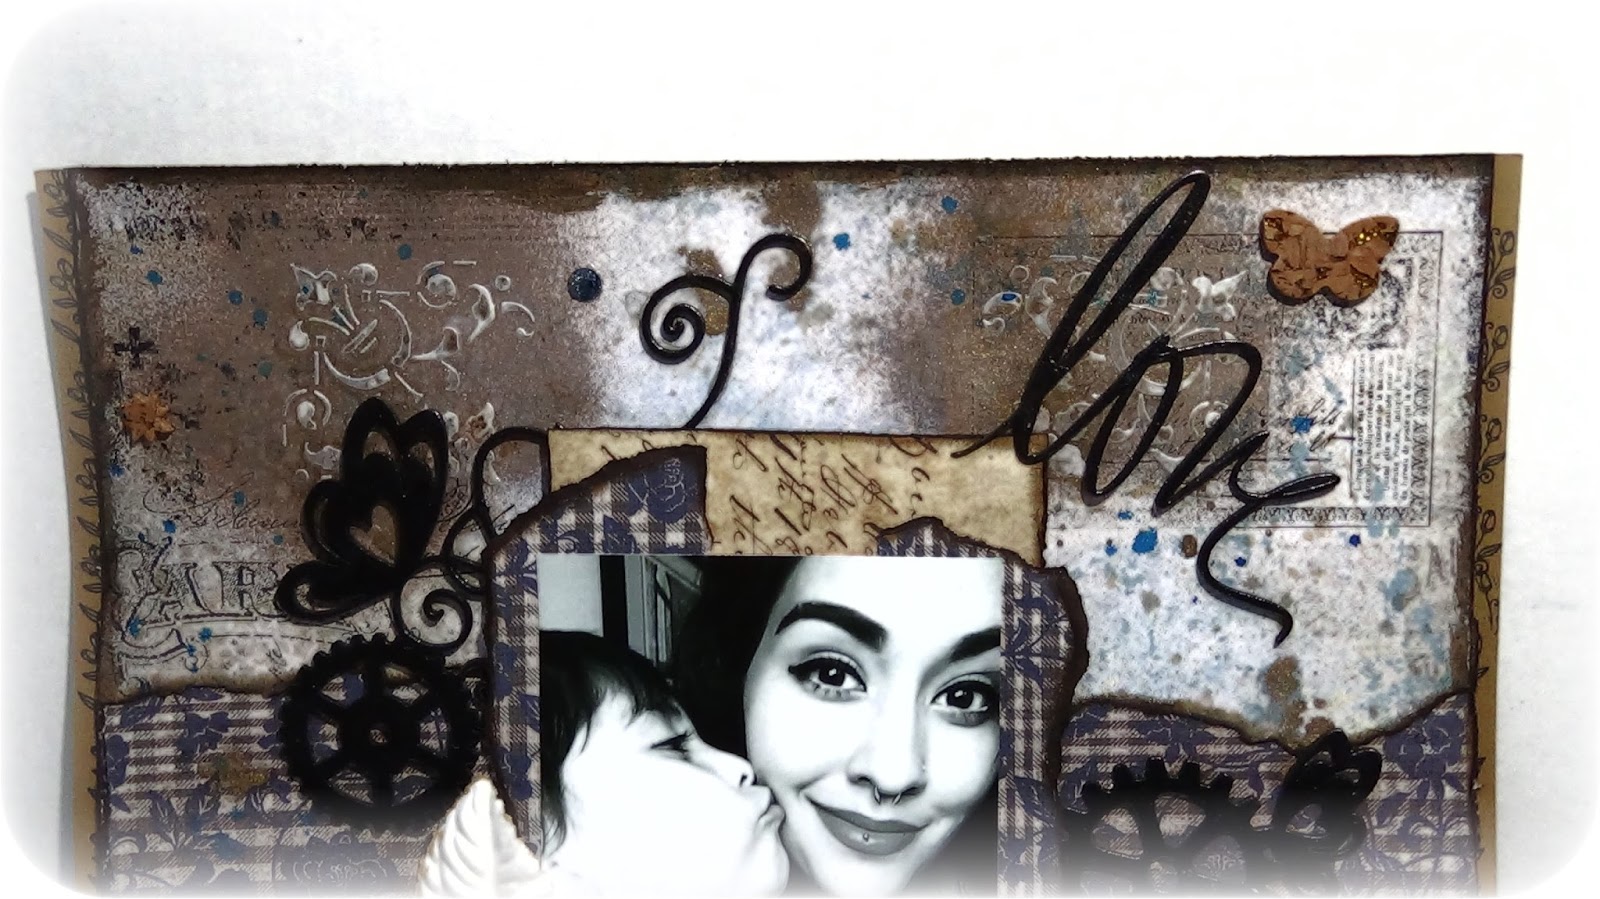
This following project is another layout I made using papers from the kit, as well as from Tim Holtz, I used Prima flowers on this one, chipboard from my Dt pkg, modeling paste, sprays and paints.
The following short video I made to show all of the above photos and also to the junk journal I attempted to make. I did enjoy making it so now I am more confident that I can make a bigger one! I will also leave a link to my YT video where I share these projects and talk more in detail the process I did to make these.
Thank you for checking out my blog post today ! I'm excited to share next months projects with you as well! They are already being made and I hope you will follow me on here so you don't miss any of the upcoming projects!!
****Here is my Youtube video:
Here are the links to Creative Scrap Designs online store & more:


